


Blackened Salmon
A classic recipe—often not available as a GF option in restaurants—that is simple to make at home

Blackened salmon is one of those menu items at restaurants that is often not available as a gluten-free option, generally because the coating contains flour. I made up this version at home the other evening and really enjoyed the results, so I’m going to tell you how I did it.
The GF flour I’ll be using is corn flour, but I’d also recommend rice flour for this and similar recipes. The reason I like corn or rice flour for frying is that they don’t absorb liquid very well, so they’ll stay dry and give you a crunchy, not soggy, coating.
I describe one optional step that I’d encourage you to try: brining. We’re going to be turning up the heat to high when cooking this, and brining will protect the salmon’s juiciness and flavor. If you happen to overcook it, the salmon will retain its flavor and won’t be dried out. I describe brining more in note 2 below.
For kitchen utensils, I’d highly recommend using a cast iron fry pan for this. Cast iron retains heat better than any other type of pan, so it will give you the blackened crust you want for this dish. Cast iron pans are inexpensive, and you can find them in places like Walmart or Target. If you don’t have cast iron, go ahead and try it with whatever fry pan you have; just be sure it is very hot before adding the salmon. Another handy utensil is a splatter screen that fits over the pan while frying.
Be sure to check out the cat update at the bottom of the page!
Ingredients:
1 pound salmon filets (see note 1)
Optional brining liquid: ¼ cup sea salt dissolved in 1 quart water (see note 2)
Several tablespoons of clarified butter (ghee) or neutral-flavored oil (see note 3)
The coating mixture below
For the coating (see note 4):
½ cup corn or rice flour (see note 5)
2 teaspoons Hungarian paprika
1 teaspoon dried herbs, such as oregano, thyme, or a blend
¼ teaspoon ground black pepper
1/8 teaspoon garlic powder
If not brining the salmon, also add ¼ teaspoon fine sea salt
A 1-quart sealable plastic bag (see note 6)
Instructions:
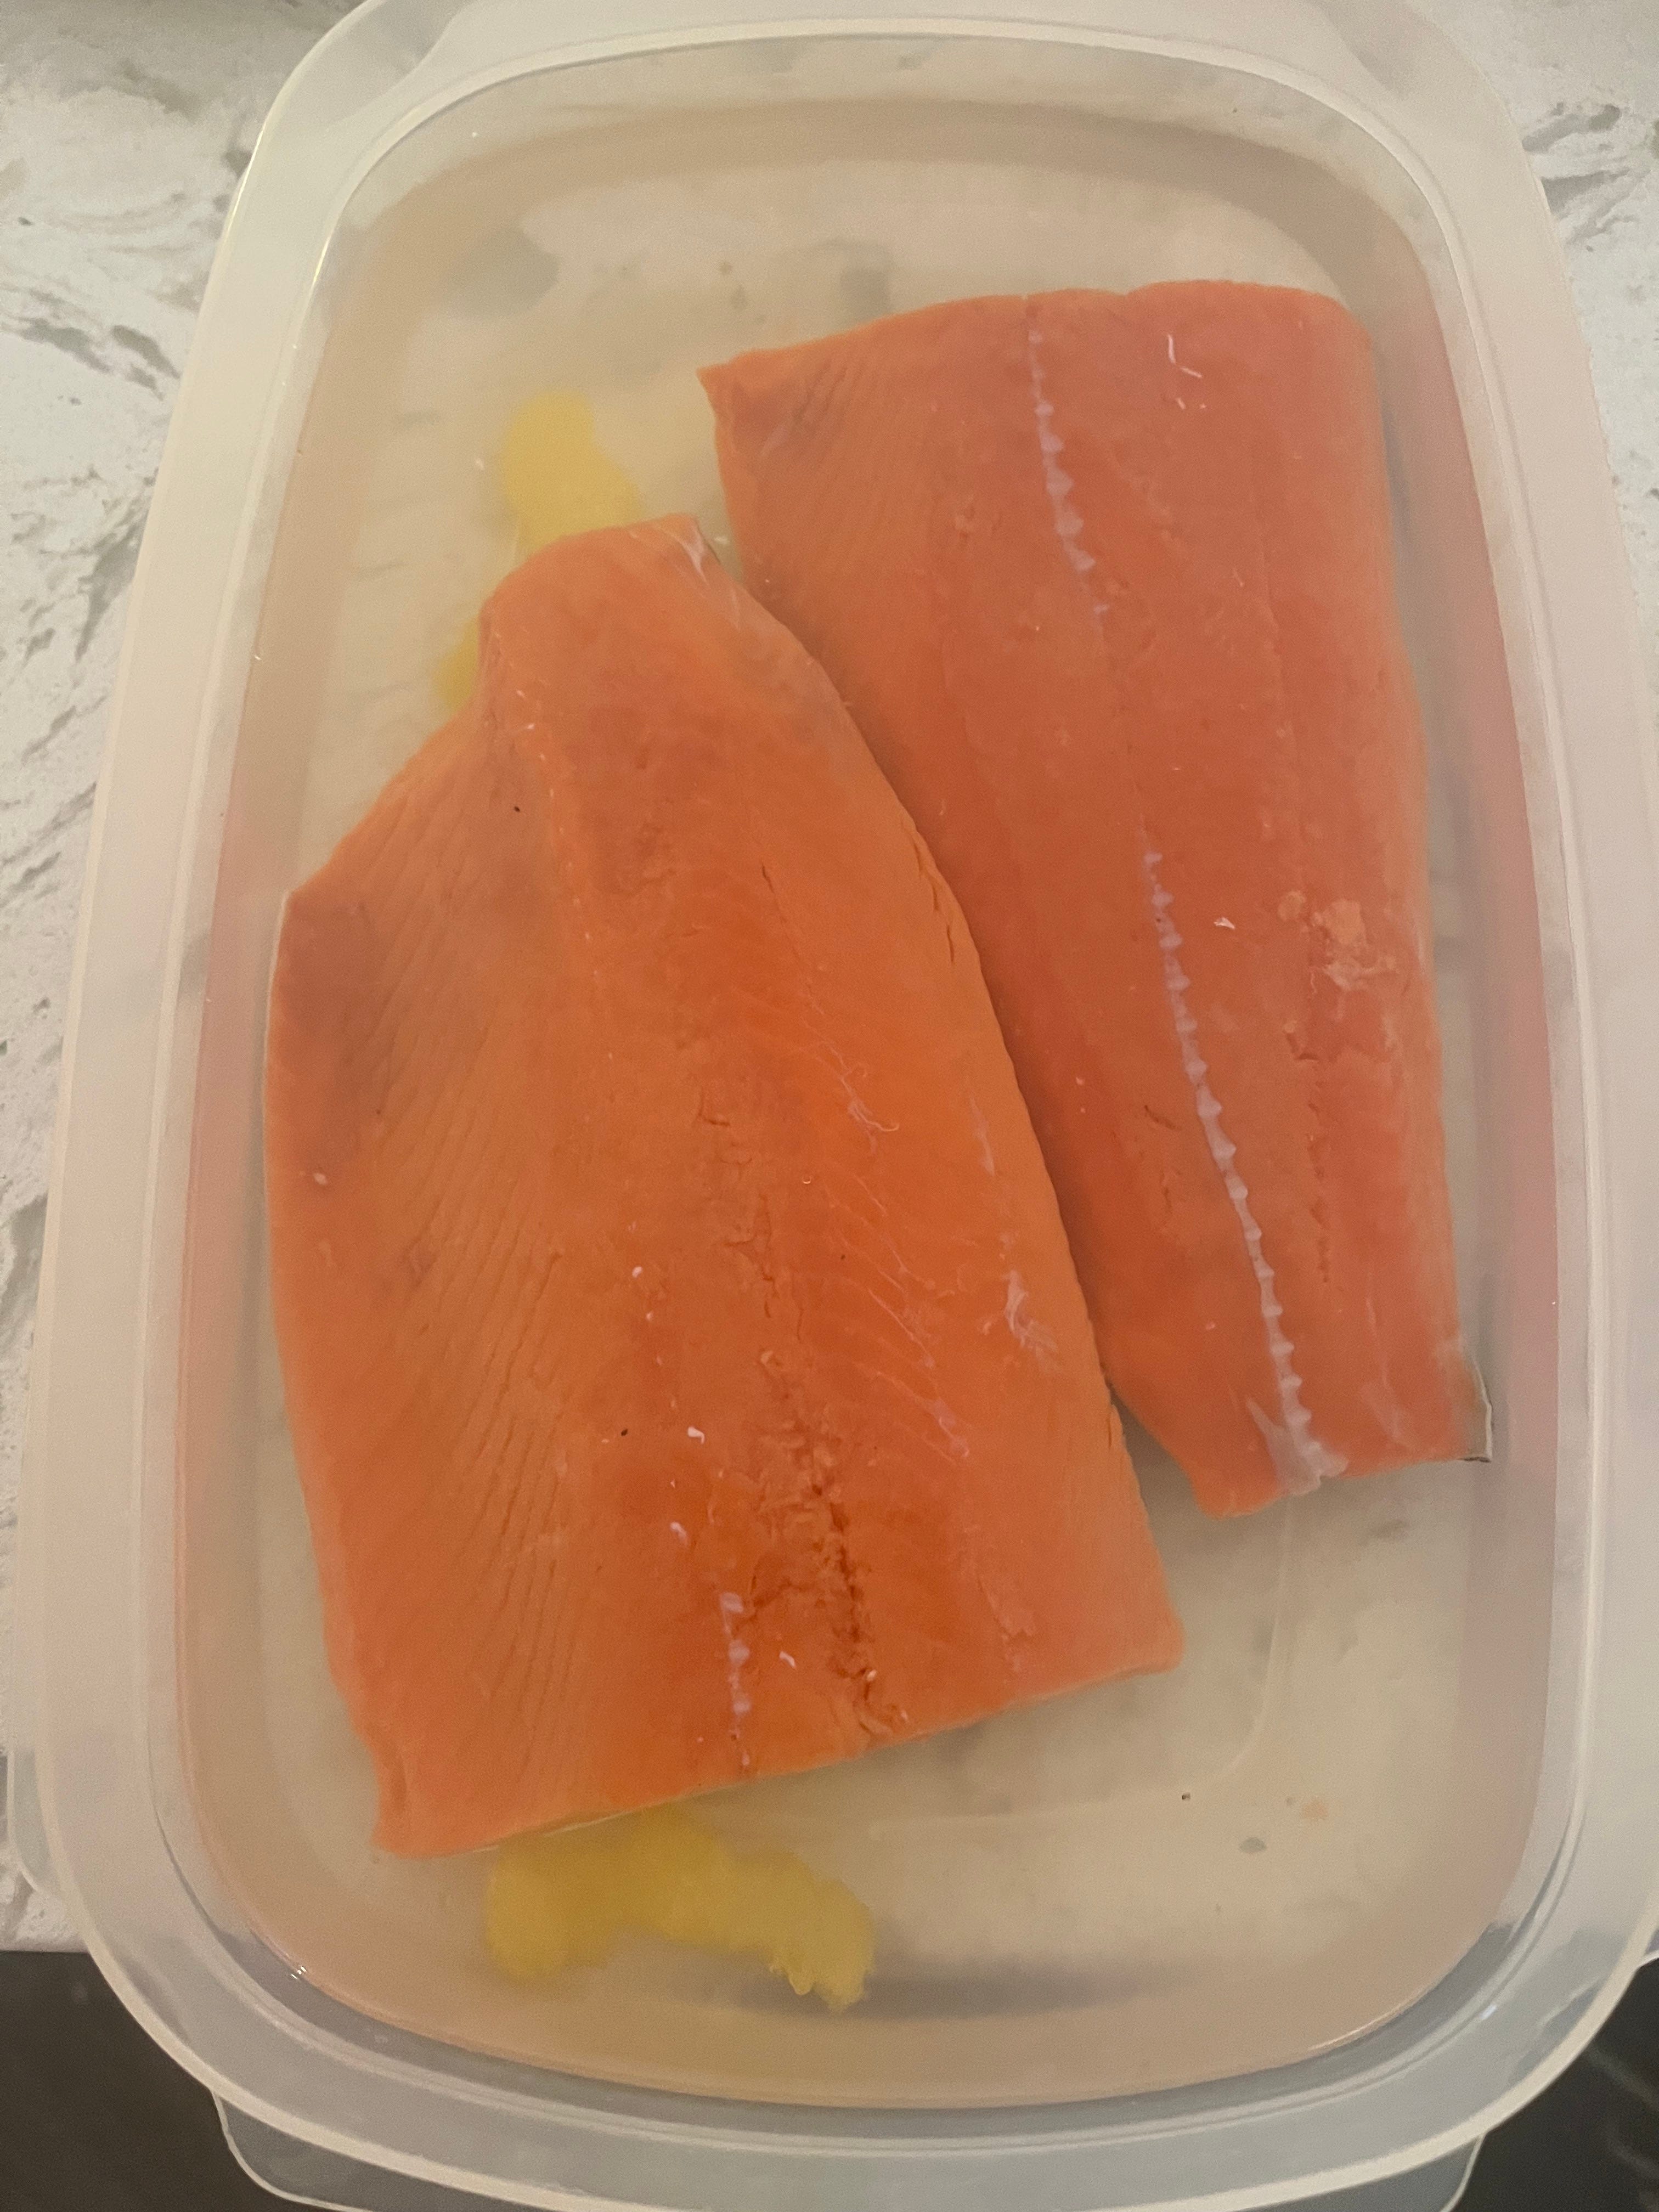
If doing optional brining: about 30 minutes before cooking, dissolve ¼ cup salt in 1 quart water, pour it into a container that is just big enough to accommodate the liquid and all of the filets, and place the salmon filets in the liquid, making sure all the pieces are submerged; remove filets from the brine after 30 minutes and pat them dry (see note 7 and photo below)
Heat the cast iron pan on your stovetop on high
When the pan is very hot, add the clarified butter or oil and wait a few minutes for it to heat
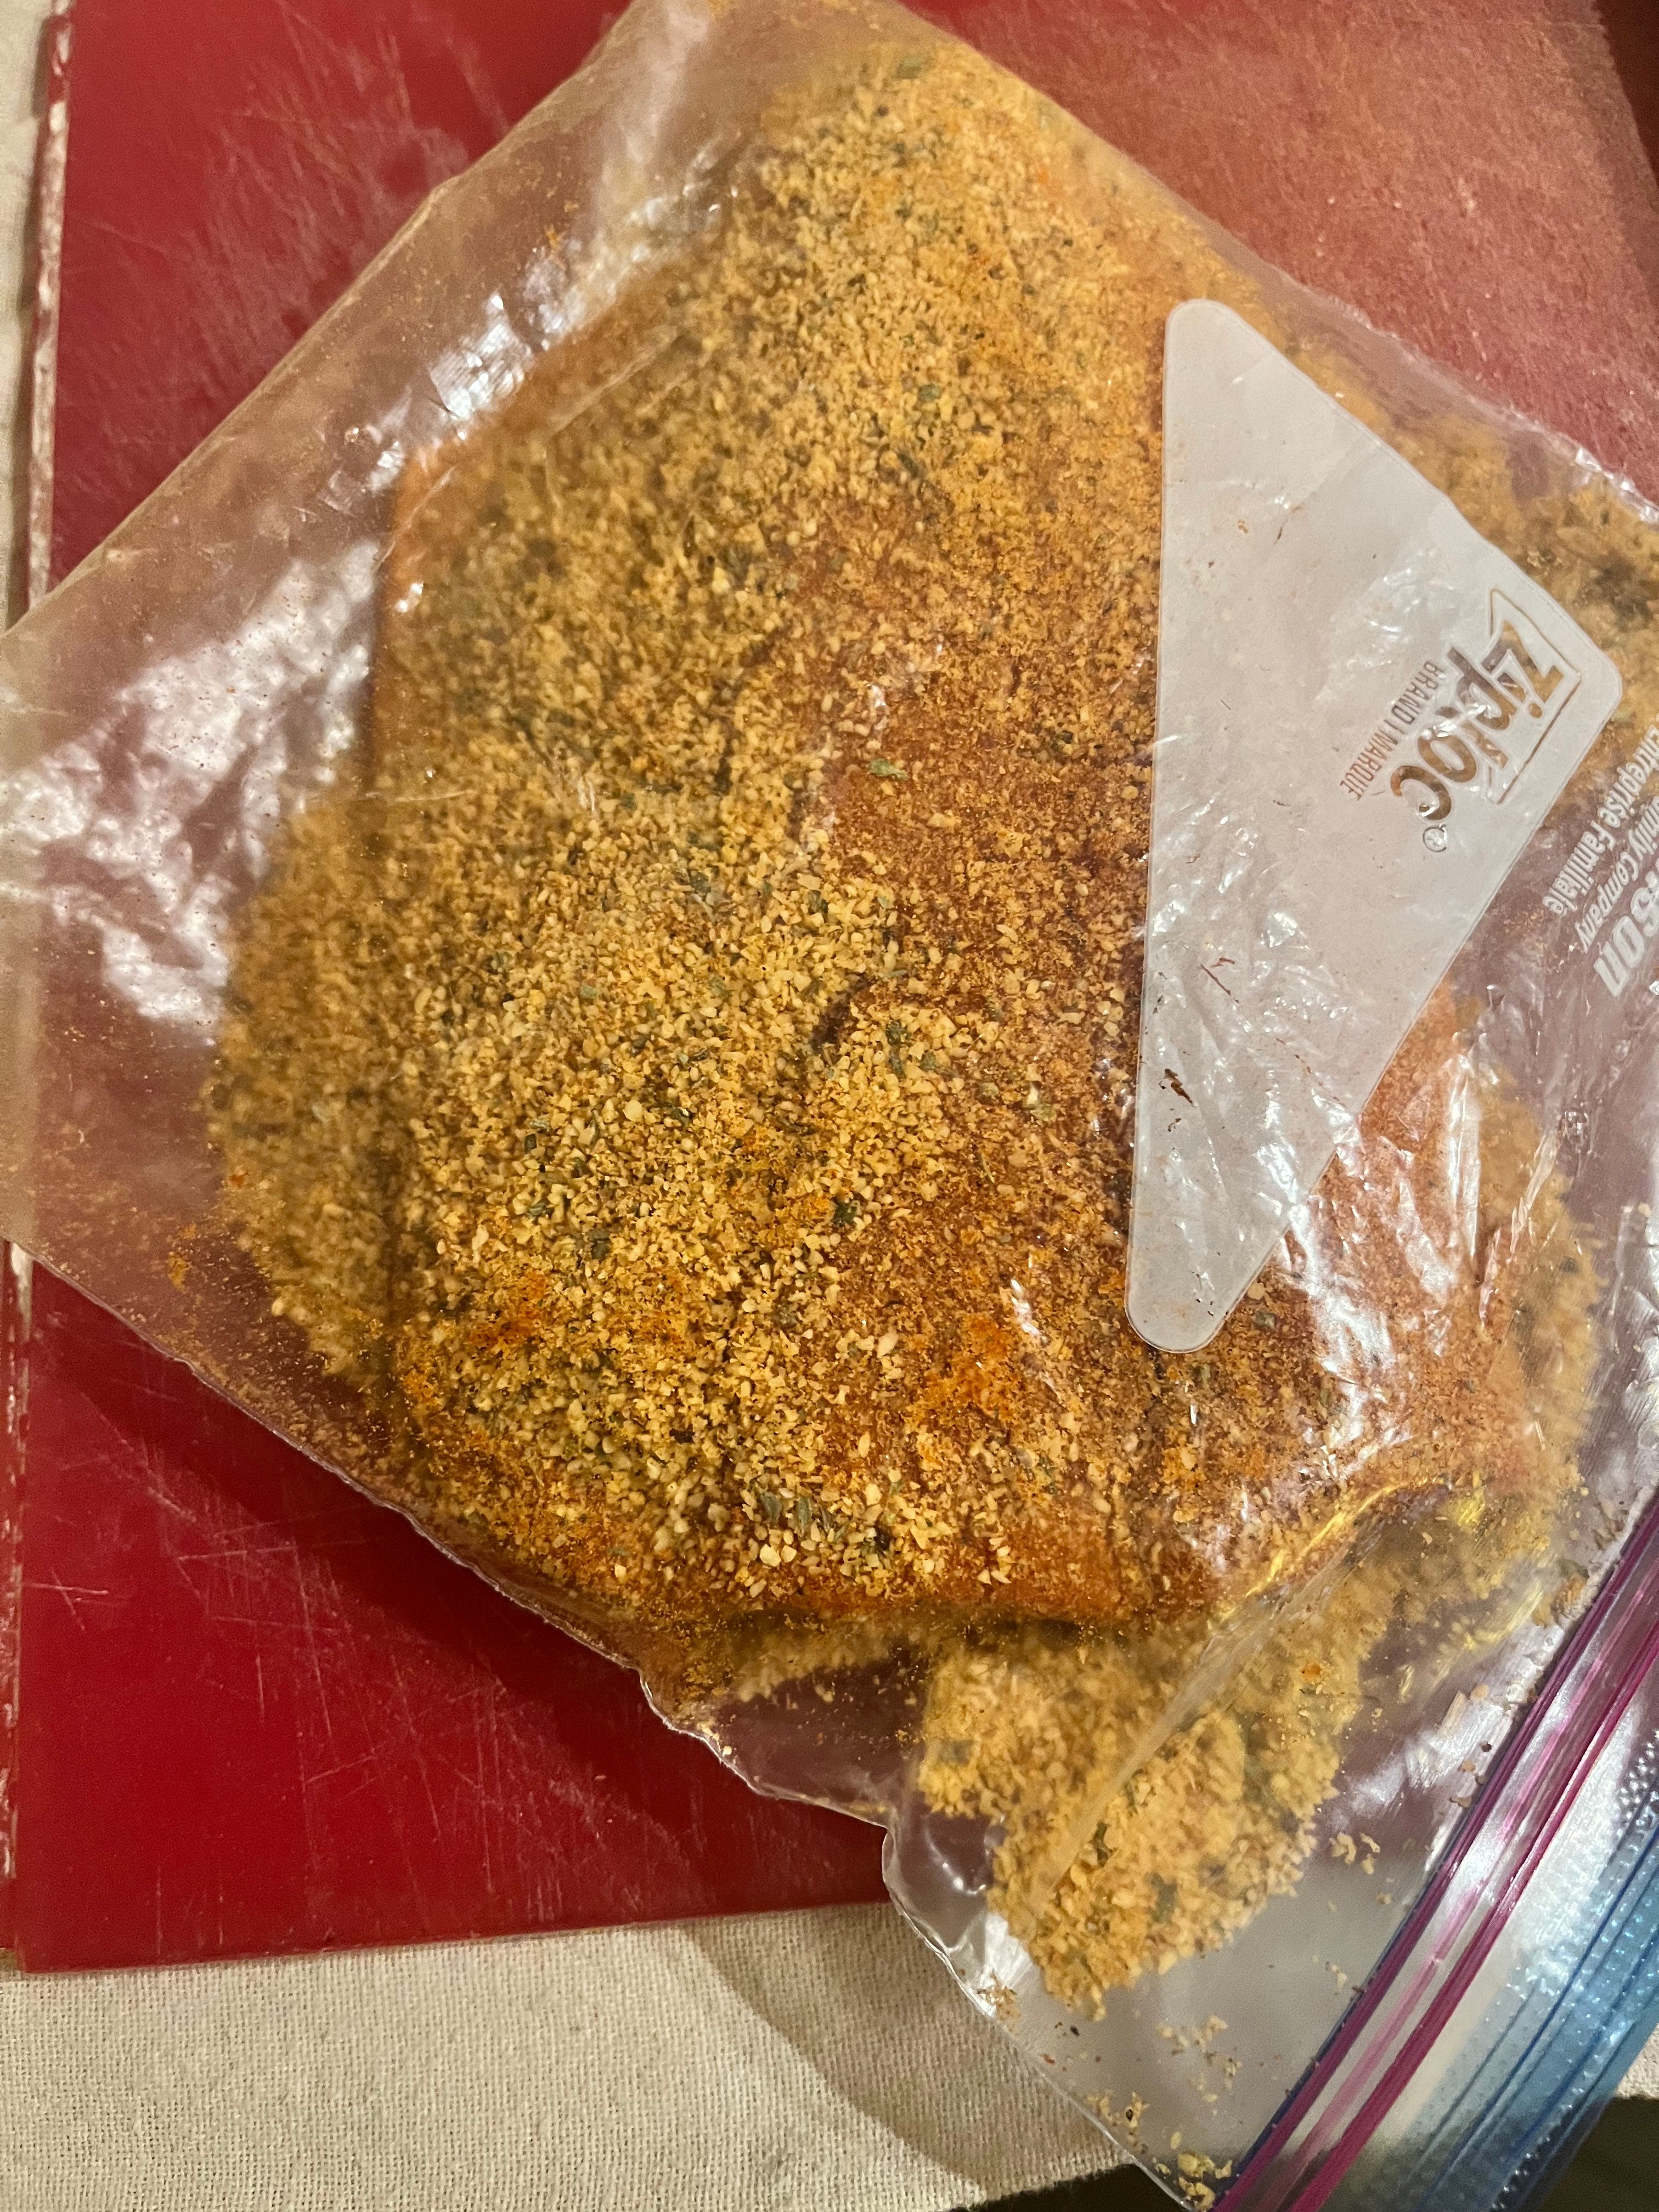
While the pan is heating, place all of the ingredients for the coating in the sealable plastic bag and shake until they are well-blended (see note 6 and photo below)
Use a paper towel to pat the salmon filets dry before coating them
One at a time, place a salmon filet in the plastic bag and turn and shake it until the filet is completely coated (the coating doesn’t need to be thick, just even—see photos below); place each on a plate until all are ready
Place all of the filets in the fry pan and fry on high heat for abut 3 minutes; if your filets have skin, start with the skin side down (see note 8)
Flip the filets and cook for another 3 minutes on high heat
Remove the filets to a plate and let them rest for 3 to 5 minutes before serving
Notes:
I started with a single large filet (an entire side of salmon) that I cut into two pieces. You can use smaller pieces if you prefer, but note that the size of the cut affects cooking time. I prefer wild salmon over farm-raised. Wild salmon is more flavorful that farm-raised, but, on the flip side, farm-raised salmon has higher fat content, so it will not dry out as quickly during cooking. Either wild or farm-raised salmon should work for this recipe. Also, I like using filets with the skin on, but you can use skinless filets. The skin is actually very good to eat when cooked properly—in this case, it’s going to get very brown and crunchy.
This brine is the same formula I use when brining any seafood or meat. If you’d like, you can also flavor the brine; flavorings I’d consider adding to this brine would be lemon zest and crushed garlic.
I like clarified butter (ghee) for this, because butter goes well with most seafood, but you can use a neutral oil, such as sunflower. I wouldn’t use olive oil for this, because high heat like we’re using here will cause olive oil to take on an unpleasant odor and flavor. My instructions say “several tablespoons” of oil because you’ll want enough in the pan to cover the bottom to a depth of about ¼ inch—so add as much as works in your pan.
The type and amount of seasonings are suggestions. If you want to add a ½ teaspoon of ground cumin, or if you want onion powder instead of garlic powder, that all sounds good to me! Just make sure to use only dry ingredients in the coating mix—don’t use fresh garlic, onion, or herbs, for example. For the coating to cook the way we want it, it needs to stay dry.
If using corn, make sure it is finely ground corn flour, and not corn meal. Corn meal is too coarse for this, although it is perfect for making cheesy grits, as I’ve described in another recipe!
If you prefer not to use a plastic bag, I’ve also done this step by mixing the coating ingredients in a bowl and spreading them on a plate. Dip the salmon one side at a time into the mixture, pressing down to make sure it’s fully coated. I’ve found the plastic bag method to be more effective in getting an even coat and less messy than the plate method.
Seafood absorbs the brine more quickly than meat, so I typically limit seafood to 30 minutes in brine, but let meat go for an hour or more.
As for everything, your cooking time will vary, depending on the temperature of the pan, internal temperature of the fish before cooking, size of the filets, etc. I would suggest starting with 3 minutes per side, which should be enough to blacken the exterior and cook the interior to a good temperature. My advice is to rely on how the salmon looks and feels. If you poke it with your finger, and it seems too soft, let it cook a little longer; if it is very firm, it is done. Another test is to use a fork to try to flake the salmon. If it doesn’t flake, then it needs more time. Getting it right is a bit of a balancing act, but I prefer to err on the side of undercooking at first and adding more cooking time if needed.
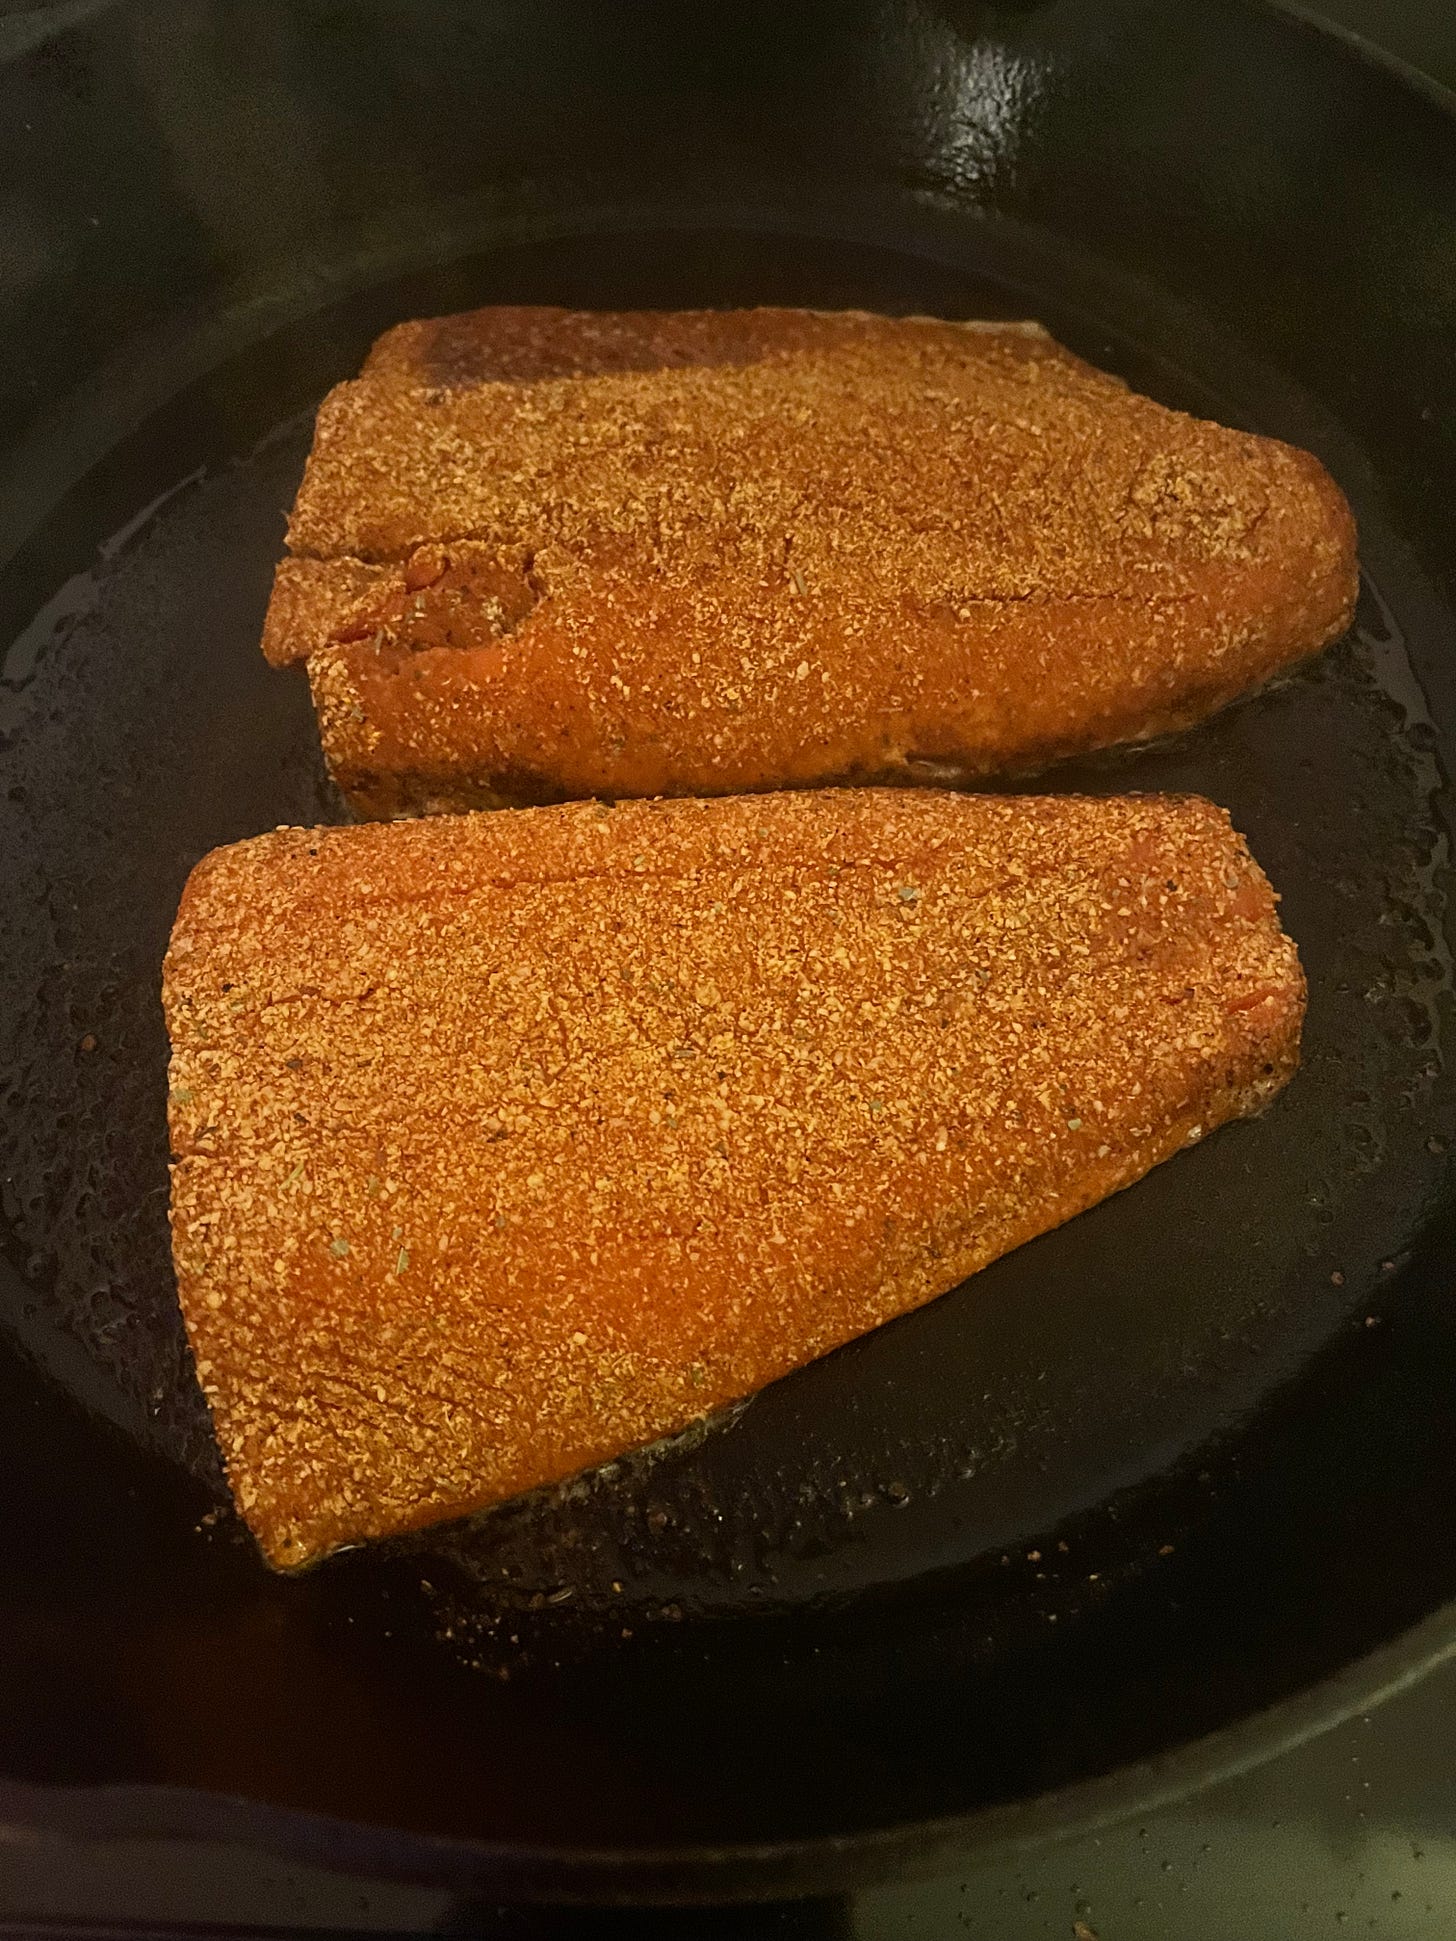
Start with the filets skin-side down. You can see here that the filets are fully coated lightly.

Cat update:

With the change of seasons, Seraphina’s fur subtly changes color, becoming lighter as the days lengthen and the weather warms. I was away from home for almost a week in early May and, when I returned home, I immediately noticed that her coat had lightened. The subtle color change may not be noticeable in photos, but I’ll include one anyway! If you have a cat, have you noticed seasonal changes in the color or thickness of the fur?